Monitoring pinion temperatures on mill gear pinions is an effective and efficient means of monitoring alignment and operating condition. Pinion temperature measurement when applied properly can adequately predict multiple failure modes, including misalignment, overheating from a loss of lubricant event, overheating from improper lubricant, and temperature anomalies from severe contamination.

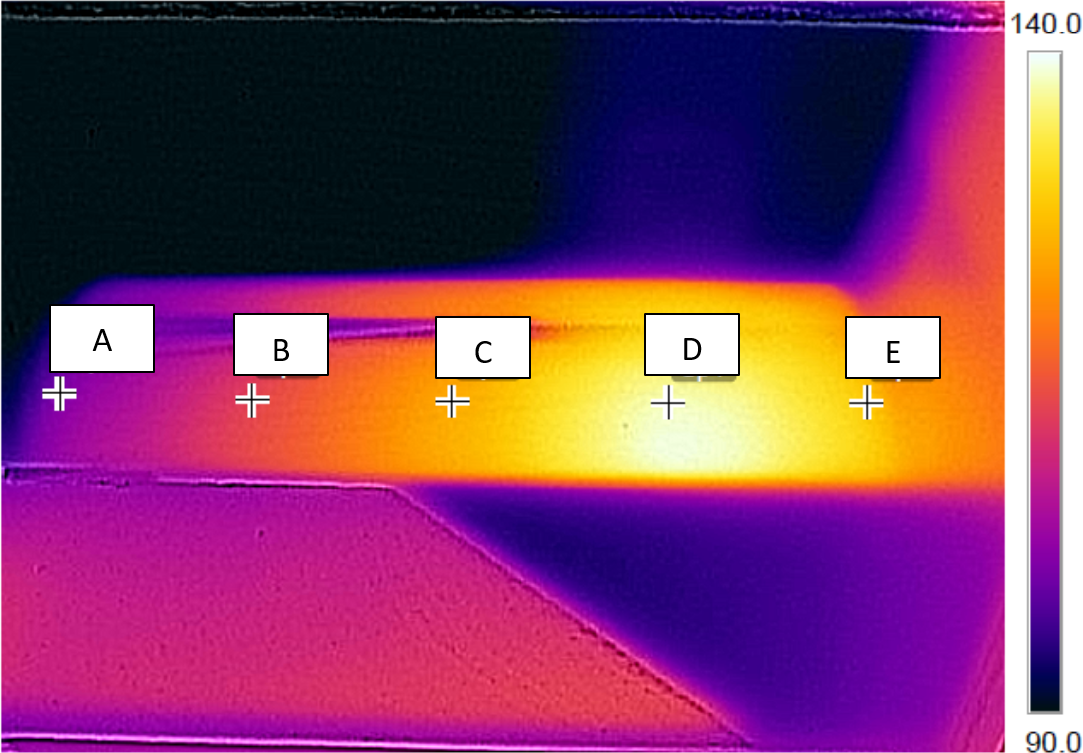
Pinion Locations shown on a pinion with misalignment
| Mill Pinion IR Temperature Profile | ||||
| Alarm | Shutdown | |||
| °F | °C | °F | °C | |
| Temp A to E | 15 | 8 | 30 | 17 |
| Temp A to C* | 30 | 17 | 45 | 25 |
| Temp E to C* | 30 | 17 | 45 | 25 |
| Any temp (MAX)* | 205 | 96 | 225 | 107 |
*Some mills depending on application may operate at higher temperatures than recommended in this chart, consult with a specialist if temperatures operate normally above 200 F
Infrared sensors can be installed that continuously sample the radiation given off by an object in the infrared spectrum, logic in the device then translates this data into a temperature reading displayed to the user. Alarms and interlocks can be set up as an automated protective system. In order to obtain an accurate infrared reading the measured objects effective emissivity must be known. Effective emissivity will vary based on an objects material, color, surface (shinny or dull), geometry, and in certain cases temperature. When applying infrared technology to mill gear pinions the user must be aware of these factors which may affect readings, and understand the proper calibration of the temperature sensors.

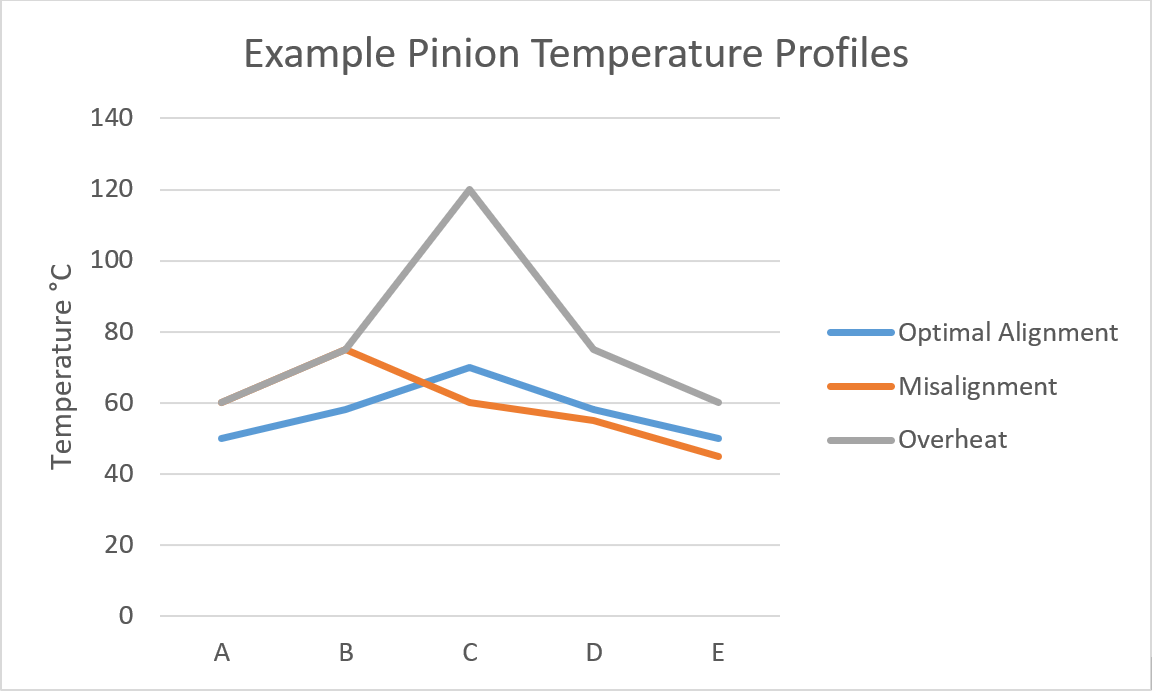
Example Pinion Temperature Profiles
Girth Gear Pinion Infrared basics
The infrared alignment technique should only be applied to mill gear pinions not kiln or dryer gears. Kiln and drier systems typically run slow and do not develop sufficient temperatures from the mesh forces and can be significantly affected by heat transfer from the kiln or drum. However valuable information can be deduced from monitoring the mesh temperature on these systems.
Pinion misalignment is a common failure cause which can lead to a variety of gear tooth failure modes through overloading. Measuring temperature differentials from end to end across an operating pinion is an indirect measurement of the misalignment. When a gear is misaligned in operation the temperature profile will shift to the side correlating with the increase in load in that area.
Overall pinion temperatures can also indicate an issue related to lubrication including lack of lubricant. A typical alarm and shutdown chart is provided below. In rare cases the normal operating end to center temperature may be elevated above 20 °C in this event consultation with a mill gearing expert should be done to ensure damage is not done from running the set.
When an array of online infrared sensors are used the following chart should dictate the alarm and interlock settings. Please consult with a mill gear specialist before setting alarms and interlocks as certain operating conditions may require adjustments to these general alarm levels.


